
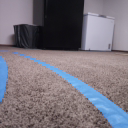
Penny-Pi is a Raspberry-Pi with a camera that uses machine learning to track and follow a blue track. The model is a CNN multi-classifier built using Keras and TensorFlow, and the data was hand collected.
Building the robot
Originally, before I bought the chassis, the robot was a battery, a Raspberry-Pi, and a Raspicam all stashed away in a styrofoam holder! While easy to move manually, the real purpose was to test tf-lite.
tf-lite allows for less capable devices (such as phones) to run TensorFlow models efficiently. One key step it performs is to quantize the model, by converting higher-bit floats to lower ones. In essence, we are cutting down decimals on our numbers (sacrificing precision) to shrink the model size and computation needed. If you are interested, the TensorFlow docs have a great page about it.
After seeing positive results, I ordered a generic chassis, and some other miscellaneous hardware. I’ve linked pretty much everything I used, but some things like the Bluetooth USB and Raspberry-Pi I had laying around.
| Name + Link | Needed? | Notes |
|---|---|---|
| Perseids Chassis Kit | ✅ ______ | If you can, 3d printing is a good choice here! |
| Raspberry Pi/Arduino | ✅ | I used an RPi2, but use whatever comp you want. |
| Camera | ✅ | Use any camera that you can fetch pictures from through code. |
| Motor Controller (L289N) | ✅ | I only needed one, but research and get more if you have more wheels/need finer control! |
| Lights | ❌ | Just to display information. |
| Speakers | ❌ | Just to hear information. |
| Bluetooth Support (USB) | 🔶 | If you want to remote-control through bluetooth, this is a necessity. |
| GPIO Wires | 🔶 | If you used the above hardware, this is a necessity. |
Keep in mind, if you want to build something like this, you can go as advanced or as basic as you want! This is just what I personally did.
Programming the controller
After wiring up the hardware and testing out the components individually, I was ready to program and get some data! The RPi GPIO library for python allows me to set a general mode, and then give outputs to each pin (HIGH/LOW). In addition, I could change the duty cycle of the L298N, essentially giving me speed control.
Using this, I was able to set up a simple driving system with forward, turn right, turn left, backwards, and of course for the runaway scenarios, stop all wheels.
Although I could use SSH and run scripts remotely for the RPi, it would be way more practical to build a Bluetooth controller for it. I’m not very versed in mobile-app development, so I found some ready made Bluetooth car control apps for the purpose.
Using pybluez, I created a setup to listen and connect to PORT 1. Depending on what you use as your Bluetooth app, you might get a stream (like AAAAAA instead of A), or on/off data (AO, AX). In this case, I got a stream of whatever my indicator character was, so I used python’s in to handle it.
import bluetooth

PORT = 1
on = True

# ... loading camera, tflite, gpio, etc ...

server_socket = bluetooth.BluetoothSocket(bluetooth.RFCOMM)
server_socket.bind(("", PORT))
server_socket.listen(PORT)

print("python server waiting on port: "+str(PORT))

client_socket, address = server_socket.accept()

print("python server connected to: "+str(address))

while on:
    data = client_socket.recv(1024)

    if b'W' in data:
        # perform some action!
While waiting, I would run sudo rfcomm watch hci0 in a separate terminal in order to allow for connection.
Data collection
After assigning say “A” -> “Forwards”, “B” -> “Start Recording”, and so on, I could control the robot entirely from my phone. Once I layed down a blue track for the robot, I would spend time driving the car around and around in circles constantly. Each second, it would take a picture, look at my current command, and label it appropriately like so:
| go left | go straight | go right |
|---|---|---|
[0, 1, 0] |
[1, 0, 0] |
[0, 0, 1] |
 |
 |
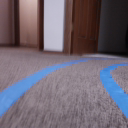 |
And after doing that for many many hours, I collected ~5k total images!
Model training
The CNN architecture I intentionally kept simple (for performance reasons), and while only getting 79% accuracy, this turned out to be the sweet spot. With typical repetitive data like this, often overfitting becomes a huge issue. Due to this lower accuracy, I avoided that, and attained two nice benefits:
The model didn’t learn the background instead of the track.
- One issue with having a noisy background is that the model might be more inclined to recognize my basement door or table rather than the track. Because it didn’t, I’m able to place blue tracks anywhere* and it’ll follow them
The model didn’t learn the tracks ahead of it.
- Rather than simply remembering all the images/track pieces, the model’s lower capacity meant it had to learn the patterns like: “If I barely see the left track, I need to turn left”. This meant I could create the track in any pattern I liked and it would follow it.
* as long as it had good lighting
Results

Needless to say, the project was a huge success! While originally the 79% accuracy was just meant for testing, I ended up keeping it due to how well it worked. The project taught me a lot about motor controllers, GPIO, bluetooth, and CNN’s!